Customer Support Portal
![]()
Parts Finder
I think the trapway is partially blocked, what should I do? Snake it?
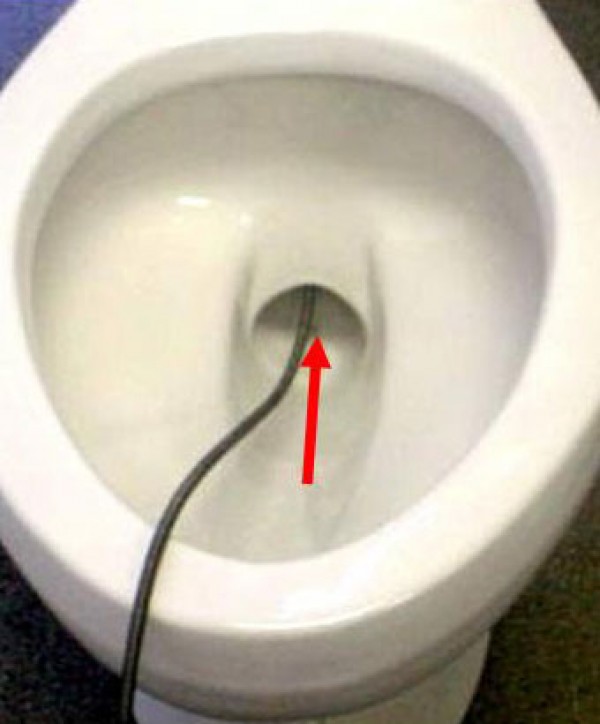
- To snake the front part of the trapway insert the snake into the bowl-you will only be able to insert the snake part way. (See figure 1.0)
- As soon as you feel resistance remove the snake; otherwise you risk it becoming lodged and you may end up breaking the toilet to retrieve it.
- To snake the back part of the trapway you must first remove the tank lid.
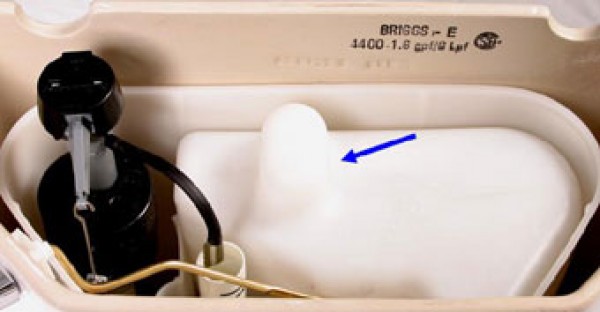
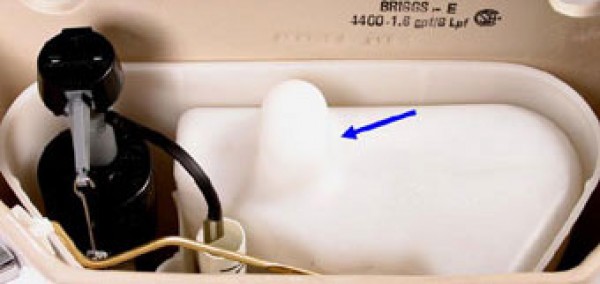
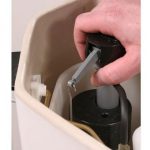
- Remove the plastic vacuum jug. (See figure 1.1)
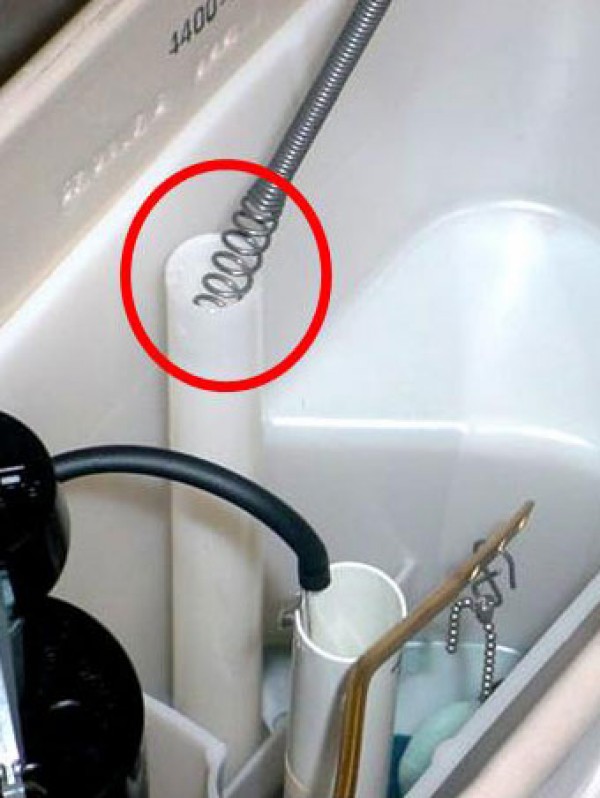
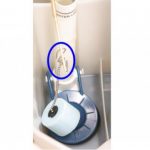
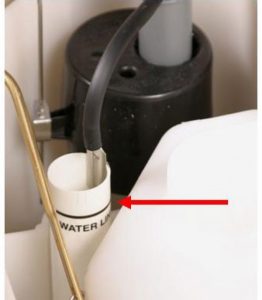
- Insert the snake into the vacuum tube. (See figure 1.2)
- Once you are finished snaking the back part, replace the vacuum jug and tank lid.
- Flush to test.
-

- I think the trapway is partially blocked, what should I do? Snake it?
-

- I think the trapway is partially blocked, what should I do? Snake it?
-

- I think the trapway is partially blocked, what should I do? Snake it?
My Vacuity runs constantly, I have to jiggle the handle to get it to stop.
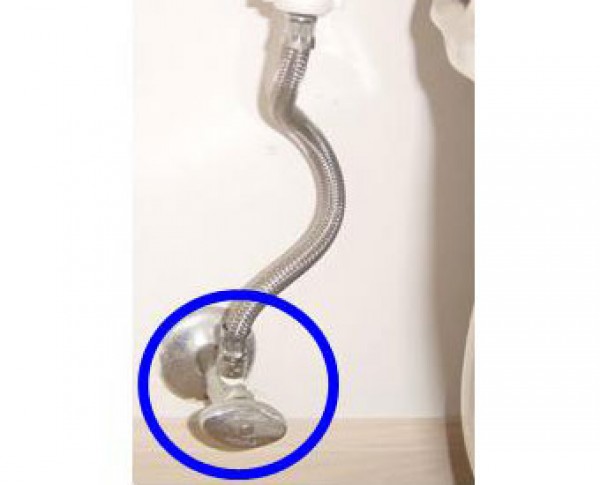
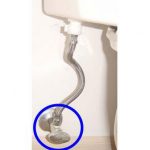
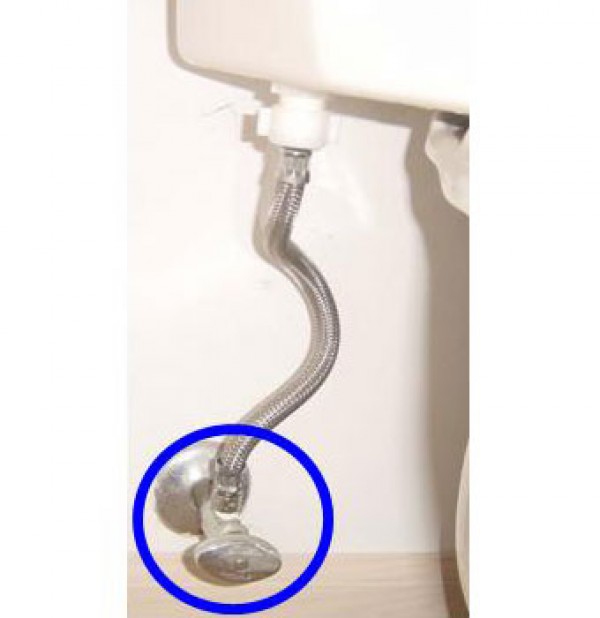
- Turn off water at the floor supply valve. (See figure 1.0)
- Flush the toilet to remove the water from the tank.
- Remove the vacuum jug. (See figure 1.1)
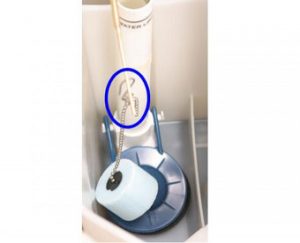
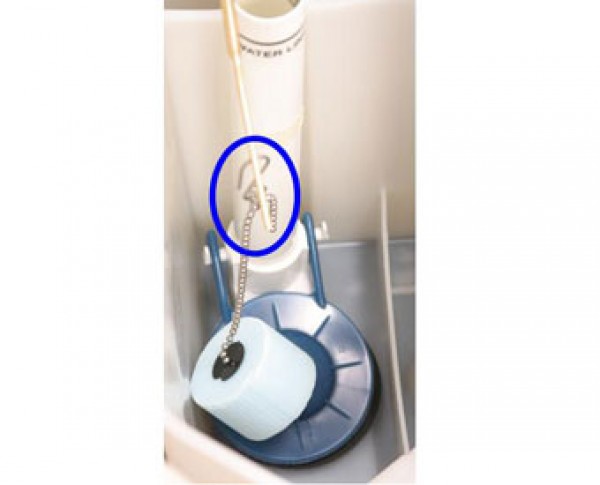
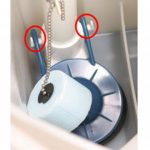
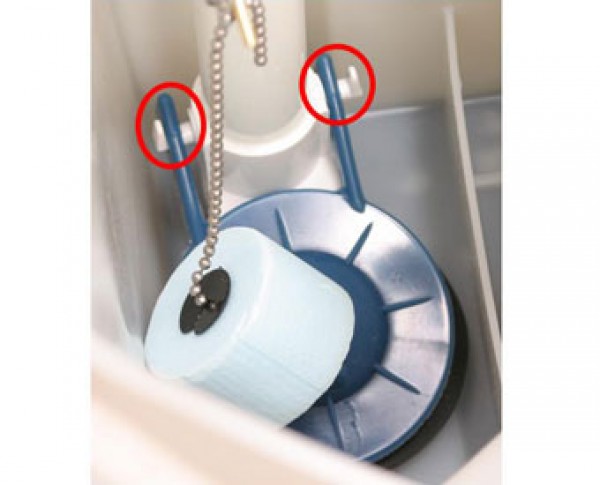
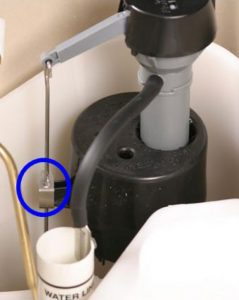
- Detach the chain from the handle lever (see figure 1.2) and detach the flapper from the arms (see figure 1.3)
- Place the flapper in hot water (not boiling) for approximately 15 minutes.
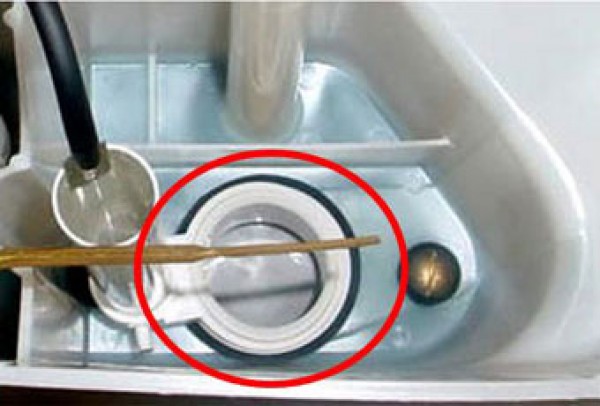
- Using a mild soap solution, clean the plastic seating surface upon which the flapper was resting. (See figure 1.4) When finished the surface should be smooth to the touch.
- Remove the flapper from the water.
- Place the flapper (while hot) back on to the seating surface. Be sure to allow 1/4″ of slack in the chain between the handle and the flapper.
- Replace the vacuum jug.
- Turn on the water. When the cold water contacts the hot flapper, it should form itself to the seating surface and provide for a satisfactory seal.
-

- My Vacuity runs constantly, I have to jiggle the handle to get it to stop.

-

- My Vacuity runs constantly, I have to jiggle the handle to get it to stop.

-
- My Vacuity runs constantly, I have to jiggle the handle to get it to stop.
-

- My Vacuity runs constantly, I have to jiggle the handle to get it to stop.

-

- My Vacuity runs constantly, I have to jiggle the handle to get it to stop.

My Vacuity is spraying water up onto the toilet seat.
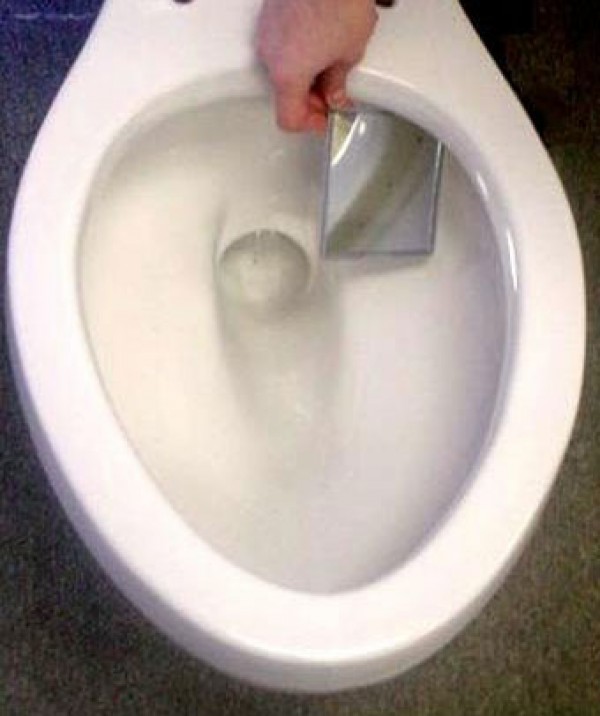
- Using a mirror examine the holes under the rim of the bowl for any debris. See figure 1.0
- To be certain rim holes are clear debris, clean the holes using a 6d or 8d nail or piece of soft copper wire.
- Flush to test. Using a mirror observe the flow of water from the rim holes to be sure that it is running along the sides of the bowl. **This step may require multiple flushes in order to check all the holes.**
-
- My Vacuity is spraying water up onto the toilet seat.
My Vacuity runs every few minutes then stops.
- Turn off water at the floor supply valve. (See figure 1.0)
- Flush the toilet to remove the water from the tank.
- Remove the vacuum jug. (See figure 1.1)
- Detatch the chain from the handle lever (see figure 1.2) and detach the flapper from the arms (see figure 1.3)
- Place the flapper in hot water (not boiling) for approximately 15 minutes.
- Using a mild soap solution, clean the plastic seating surface upon which the flapper was resting. (See figure 1.4) When finished the surface should be smooth to the touch.
- Remove the flapper from the water.
- Place the flapper (while hot) back on to the seating surface. Be sure to allow 1/4″ of slack in the chain between the handle and the flapper.
- Replace the vacuum jug.
- Turn on the water. When the cold water contacts the hot flapper, it should form itself to the seating surface and provide for a satisfactory seal.
-

- My Vacuity runs every few minutes then stops.
-
- My Vacuity runs every few minutes then stops.
-
- My Vacuity runs every few minutes then stops.

-
- My Vacuity runs every few minutes then stops.
-
- My Vacuity runs every few minutes then stops.
My Vacuity will not flush unless I move the metal rod inside the tank.
- Turn off water at the floor supply valve. (See figure 1.0)
- Flush the toilet to empty the water out of the tank.
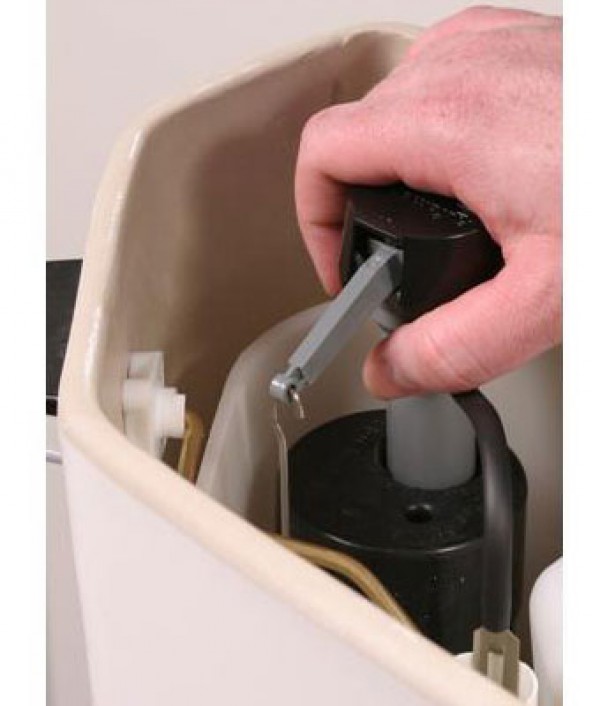
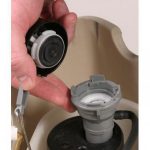
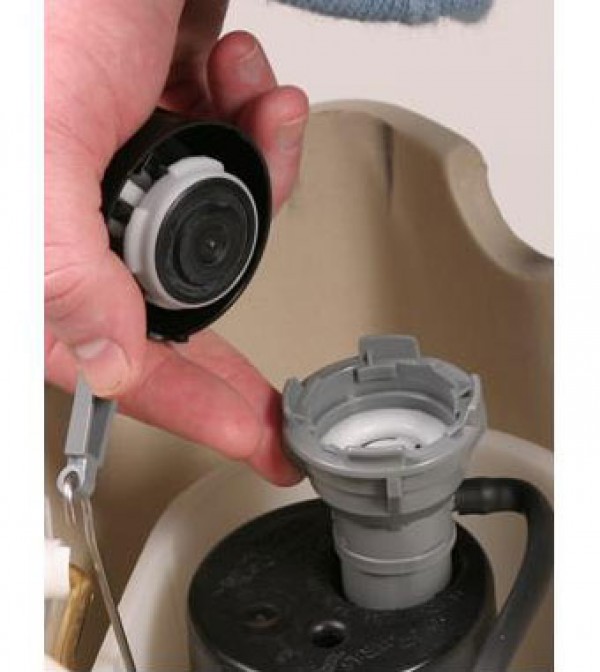
- Grab hold of the cap assembly with the gray arm resting on your thumb. (See figure 1.1)
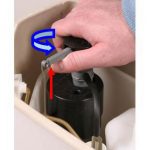
- Holding the gray arm in the “up” position, turn the entire cap assembly counter clockwise ¼ turn (See Figure 1.2) and lift to disconnect the cap from the shaft.(See figure 1.3)
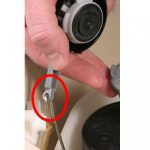
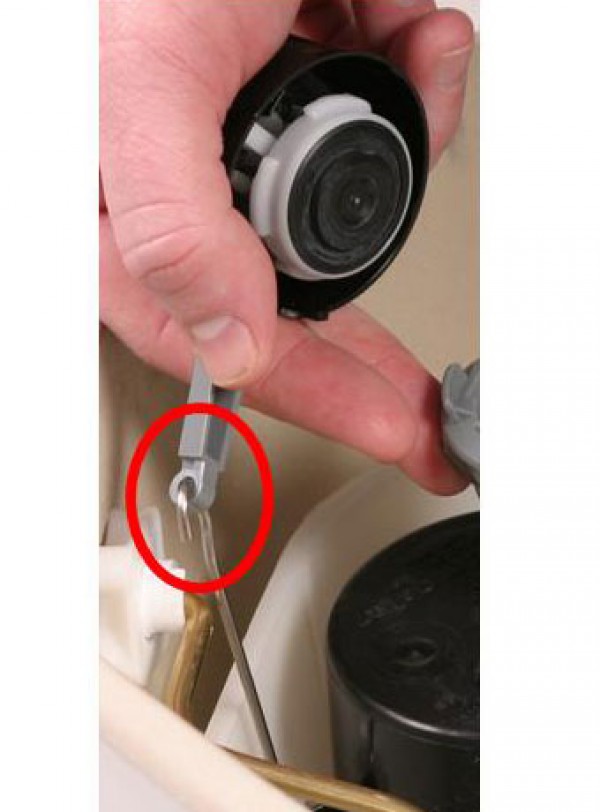
- Disconnect the gray arm from the metal rod. (See figure 1.4)
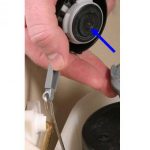
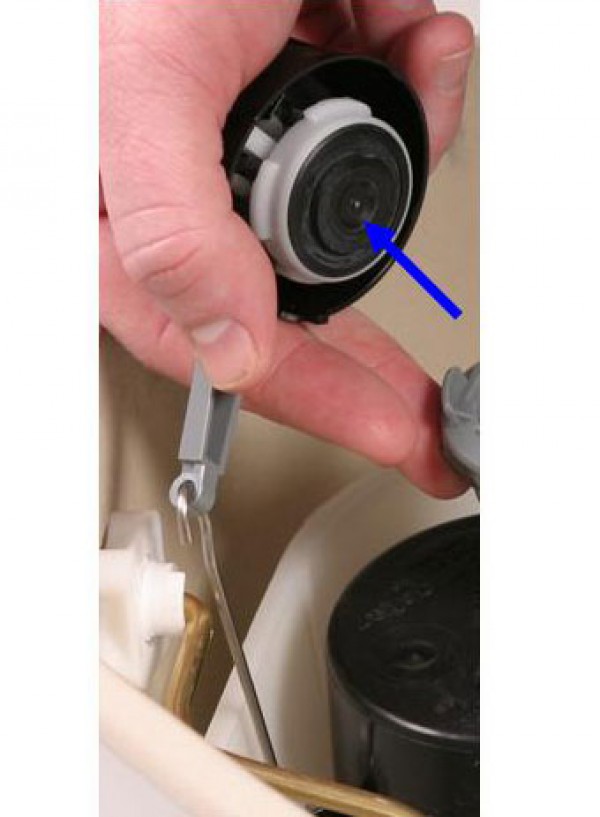
- When you turn the cap assembly upside down you will see the black seal (see figure 1.5) with a small diameter metal rod protruding from the center.
- Remove the seal and replace with the new Fluidmaster 242 seal.
- Place the gray arm back on to the metal rod.
- Place the cap assembly over the shaft, hold the gray arm in the “up” position, and turn the cap assembly clockwise until it locks into position. *Make sure that the metal rod is positioned on the left side of the divider. (See figure 1.6)
- Turn on the water at the floor supply valve.
- Flush to test.
-
- My Vacuity will not flush unless I move the metal rod inside the tank.
-
- My Vacuity will not flush unless I move the metal rod inside the tank.
-
- My Vacuity will not flush unless I move the metal rod inside the tank.

-
- My Vacuity will not flush unless I move the metal rod inside the tank.
-
- My Vacuity will not flush unless I move the metal rod inside the tank.
-
- My Vacuity will not flush unless I move the metal rod inside the tank.
-

- My Vacuity will not flush unless I move the metal rod inside the tank.

My Vacuity won’t stop flushing.
- Carefully remove the tank lid.
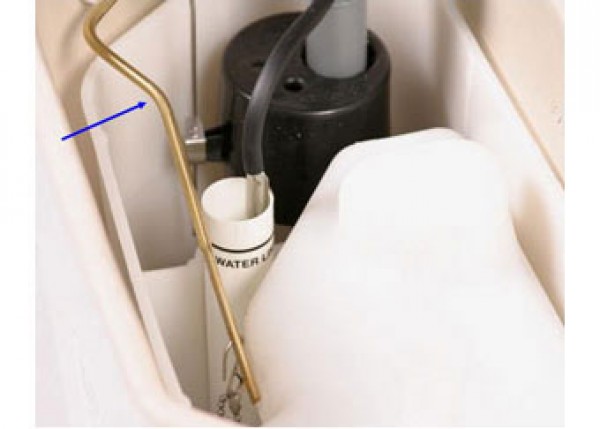
- Locate the handle rod. (See figure 1.1)
- Bend the handle arm towards the front of the tank so that it clears the plastic vacuum jug. When bending please be careful not to break the rod.
- Using two pairs of pliers may help; one to bend the rod with and the other to hold the rod in place at the first bend point. (See figure 1.2)
- Replace the tank lid.
- Flush to test.
-
- My Vacuity won’t stop flushing.

-

- My Vacuity won’t stop flushing.
-

- My Vacuity won’t stop flushing.
The water in my Vacuity Tank keeps running and overflowing into the overflow tube.
Directions:
There are three possible fixes for this scenario: resetting the water level, checking the valve seal, and cleaning debris under the valve seal. Let us begin with resetting the water level.
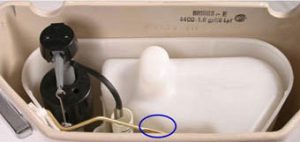
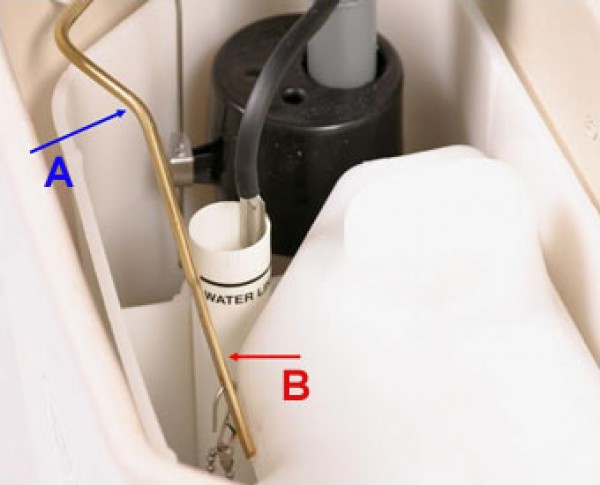
- Locate the water level adjustment clip. (See figure 1.0)
- To change the water level squeeze the top and bottom of the clip together and slide the clip down the rod to lower the water level. Sliding the clip up raises the water level. Do this in 1/8″ increments until the proper water level is reached.
- Flush and repeat as necessary until the water level is at or slightly above the water line mark on the overflow tube. (See figure 1.1)
-
- The water in my Vacuity Tank keeps running and overflowing into the overflow tube.

-
- The water in my Vacuity Tank keeps running and overflowing into the overflow tube.

ADA
Stands for the American Disabilities Act and has become known as “Handicap” or “Comfort Fit” toilets.
Bolt Caps
Decorative, color-coded caps that cover the bolts that hold the toilet bowl down to the floor.
Flapper
Mounted on the flush valve and keeps the water in the tank until flushed.
Flush Valve
This is the valve that contains the flapper and the overflow tube.
High Efficiency Toilet (HET)
Any toilet that averages or surpasses 1.28 gallons per flush.
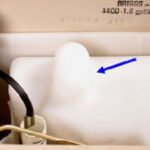
Lid
The removable top of the tank. The underside of the lid will usually contain the model number of the lid and the date of manufacture.
One-piece vs. two-piece
The one piece toilet is a self-contained unit whereas the two piece unit has a tank that is bolted to the bowl to form the complete toilet.
Refill Tube
Small diameter rubber hose that goes from the ballcock to the overflow tube. This hose supplies the water to the toilet bowl after flushing. There should be no “kinks” in this hose.
Rim Jet
Holes under the rim of the toilet bowl that direct the water down the sides of the bowl during flushing and refill. Check periodically with a 6d nail or 10 guage wire to ensure they are not clogged with chemical deposits (hard water).
Rough-in
The measurement from the “finished wall” to the center of the drain (center of the bolts holding the bowl down). This is normally 12″ but can be special ordered in the 10″ and 14″ models.
Seat
The actual seat that you sit on.
Tank
Contains the water used to flush the toilet and refill the bowl. The model number and date of manufacture will normally be located on the inside back wall of the tank near the water line.
Trip Lever
Located on the outside of the tank and is used to actuate the flush valve to initiate the flushing cycle. The chain or strap going from the handle assembly should have no more than 1/4″ of slack to keep the flapper from closing prematurely.
Water Control Valve
Usually referred to as the “Ballcock.” This is the valve that controls the water coming into the tank and turns on when flushed and off when the water is up to the “waterline” mark inside the tank.
Water Supply Valve
This is the valve located near the floor that supplies water to the ballcock/water control valve. This valve should be fully open at all times except for maintenance.
Wax Ring
Located between the bowl and the floor flange to provide a water-tight connection to the soil drain (sewer).